Thanks to this tutorial we will be able to build the object hierarchy.
We will see as we can buil a Solar System with Planets and Satellites.
| Tutorial File: Tut02_Hierarchy.zip 11.7Kb |
|
| |
|
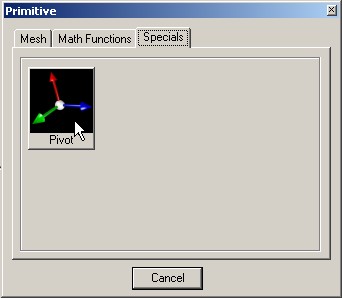
| Insert a Pivot.
This is an important kind of object just for the hierarchies building,
as a matter of fact it can't be visualized.
The main function is that of moving the object rotation fulcrum,
however we will have the chance to appreciate its use later. |
 |
| |
|
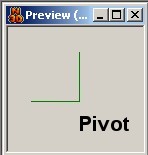
| The Pivot is represented by three perpendicular lines
with a common origin.
These lines represent the direction on the three axis X,Y and Z
of the Pivot itself, and the origin is just the Pivot position. |
 |
| |
|
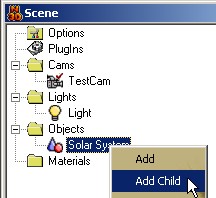
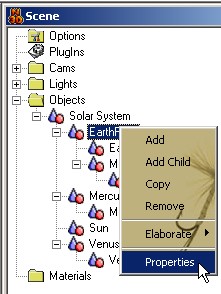
Rename the Pivot and a Child.
A child is an object subordinate to the Father;
if we move the Father as consequence we move also the child,
it's the same also about Rotation and Scale.
In this case we will choose a Mathematical Sphere. |
 |
| |
|
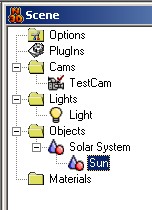
| Rename the object just inserted in "Sun",
and here the resultant Scene Tree. |
 |
| |
|
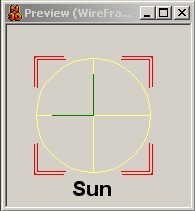
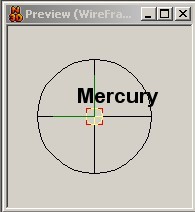
| Thanks to a preview in WireFrame we can appreciate
our work. |
 |
| |
|
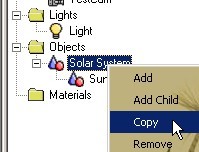
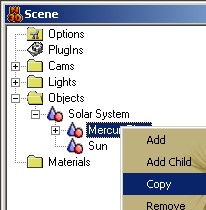
But now we add the Planets.
So we copy the two objects which we have built up till now. |
 |
| |
|
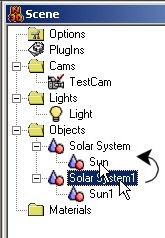
| See the copy result thanks to the figure.
Now keep pressing the left button of the mouse
on the objects couple previously inserted and dragging the object icon
on the "Solar System" object. |
 |
| |
|
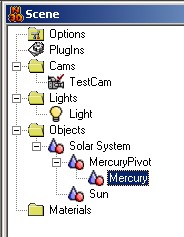
| That is a hierarchy operation, infact in that way we have said
to the object "Solar System1" to be the
object child of "Solar System".
Now rename the "Solar System1" Pivot in
"MercuryPivot" and "Sun1" in "Mercury". |
 |
| |
|
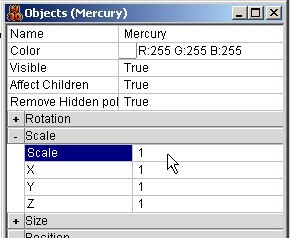
| Now at the "Mercury" object property and go to set the Scale to 1. |
 |
| |
|
| Here we have the result: Mercury after the Scale modify. |
 |
| |
|
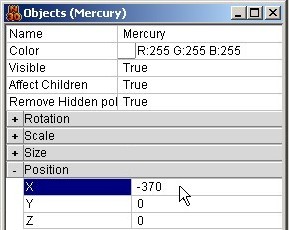
| Now modify the planet position, this will help us to define
its distance from the Sun. |
 |
| |
|
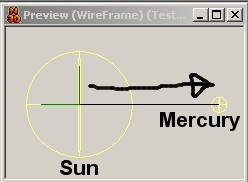
| Now we can see the operation result of moving. |
 |
| |
|
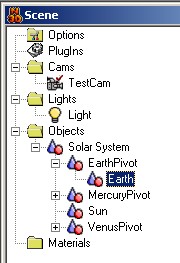
Now we see how add new Planets to our Solar System.
Firstly, we have to do a copy of the Pivot Mercury. Then renamed the
new system Pivot+Planet with the right name.
As we have done about Mercury the same we do in reference to each planet,
but with Scale and Position values in relationship with those of real Planets. |
 |
| |
|
| This is the situation of objects after having added Venus and Earth. |
 |
| |
|
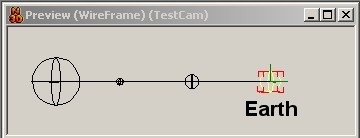
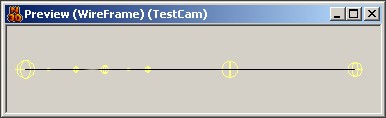
| And here comes a Preview in WireFrame which helps us to appreciate our work. |
 |
| |
|
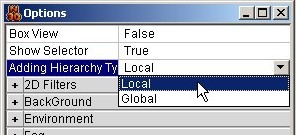
Now we see how we can endow Earth with its inseparable companion: the Moon
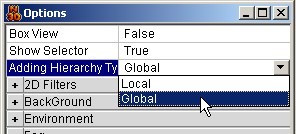
Firstly, we go to the Scene Options and modify the "Adding Hierarchy type"
property in "Local".
Thanks to this modality we could add the Moon bringing as reference the
local coordinates of Father: the Earth. |
 |
| |
|
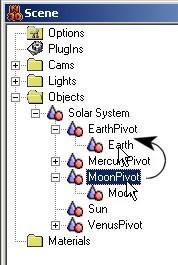
Now we add another System Pivot+Planet as we have seen previously.
Then we bring the object icon MoonPivot and move it on the Earth object icon. |
 |
| |
|
| Now set the "Adding Hierarchy type" property in "Global". |
 |
| |
|
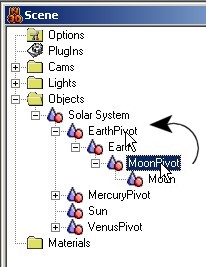
Now we need a last operation to insert the Moon.
We have to bring the MoonPivot object icon and move it
on the EarthPivot object icon. |
 |
| |
|
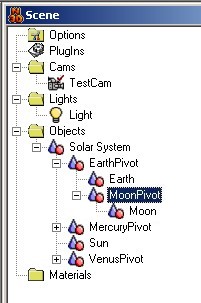
| Now we can see how the Scene Tree is after the insertion of the Moon. |
 |
| |
|
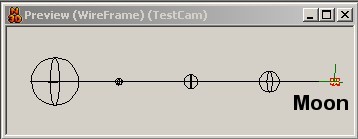
| And here there is the same significant result thanks to the Wireframe preview. |
 |
| |
|
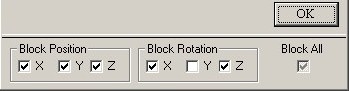
For completing the work we insert some constraint to our Hierarchy.
So we have to go to the Object Properties. |
 |
| |
|
We block the position and the rotations as in the figure.
And we do the same operation on all the Scene Objects. |
 |
| |
|
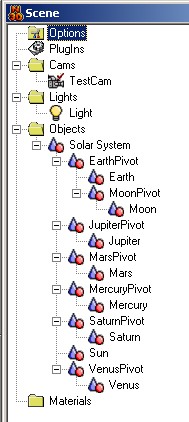
It is up to you complete the building of the other Planet,
and possible Satellite, of our Solar System.
Here there is an example till Saturn. |
 |
| |
|
| We do a last preview to see how is the situation. |
 |
| |
|
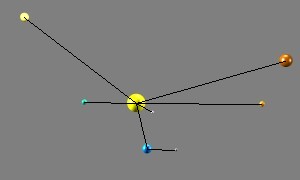
And now begin to rotate the Pivot on the Y axis and we do RayTracing tests.
Here there is an image processed with AA(High) and with the conjuction
lines of the Hierarchy overlapped in postproduction. |
 |
| |
|
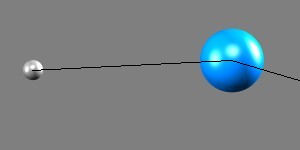
| Another view of the same Scene, this time we are seeing the Earth-Moon system. |
 |
| |
|
| Another view again. |
 |