Thanks to this tutorial we will be able to use the Bump Maps of picture and noise type.
| Tutorial File: Tut03_Bump.zip 19.8Kb |
|
| |
|
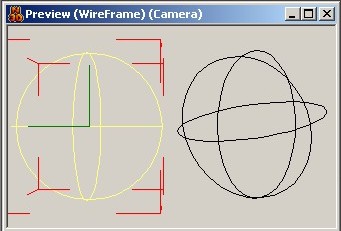
| Add two Mathematical Sphere and arrange them into the Scene as the Figure shows. |
 |
| |
|
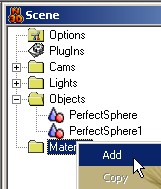
| Add a Material. |
 |
| |
|
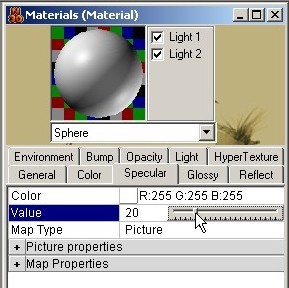
| Reduce the Specular Value... |
 |
| |
|
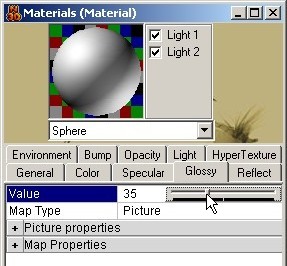
| ...and then reduce the Glossy Value. |
 |
| |
|
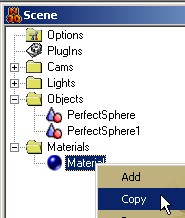
| Now we copy the Material... |
 |
| |
|
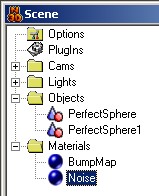
| ...and rename the two materials as we see from the figure.
Then we assign the Materials to the correspondent objects,
moving the material icon on the object icon. |
 |
| |
|
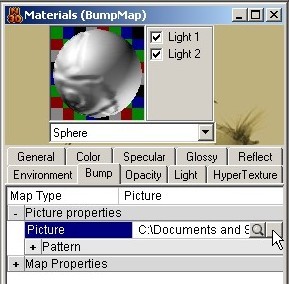
| We select the material previously renamed "BumpMap",
go on the Bump map properties and load
the attached picture to the tutorial (directory Texture). |
 |
| |
|
| Modify the picture repetition number as the figure. |
 |
| |
|
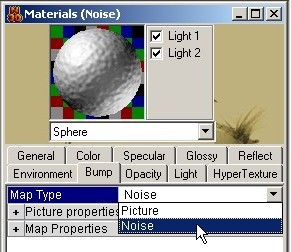
| Now at the Material "Noise"
set the Bump map type at "Noise". |
 |
| |
|
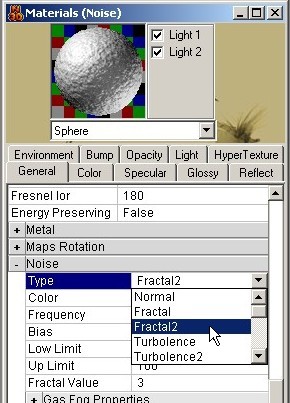
| Now we complicate the Noise material "apparance" and go to the General properties
of the material.
Modify the Noise type in "Fractal2"... |
 |
| |
|
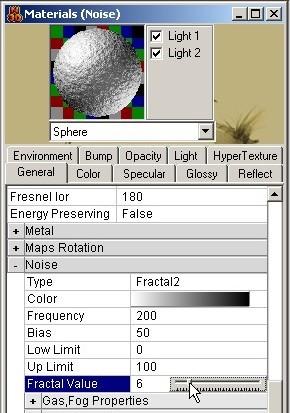
| ...and increase the Fractal value to 6. |
 |
| |
|
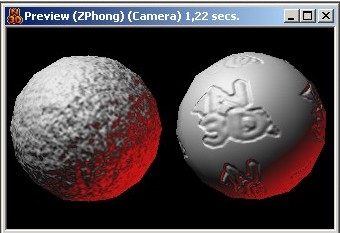
| Now we do a Preview in ZPhong modality. |
 |
| |
|
| But we want much more! Then we go on the Scene Options,
active the Antialising and set the Adaptive threshold to "Medium". |
 |
| |
|
| Now render the Scene so, with a little of patient, we could
obtain as a result the image as this one. |
 |
